Showing posts with label christmas. Show all posts

Saturday, 28 December 2013

{26 Things I Made}: 23 & 24/26 - clay ornaments (two ways)

I hope you all had a lovely Christmas with good food and good company.  Our Christmas day ended up being quite busy catching up with my family and Alex's family, and we have enjoyed having a quiet couple of days to potter before the next lot of visitors.  I'm quite surprised that I've managed to complete this 26 Things project with my lack of posting and crafting earlier in the year, but there was a rush of productivity just before Christmas!  Here are number 23 and 24/26.  I'll be back before the New Year to post about my last two special projects...

Baking Soda Clay Ornaments
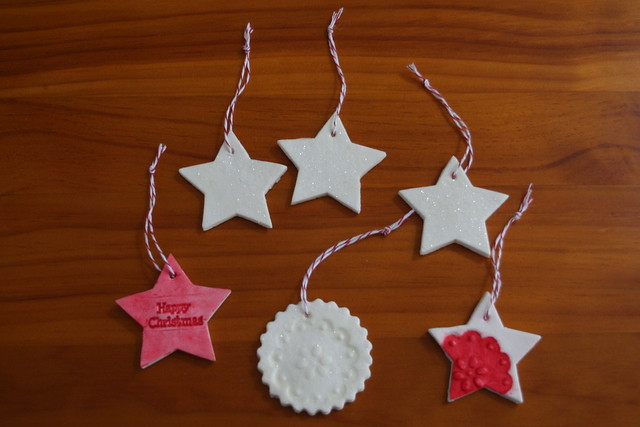
Baking Soda Clay Ornaments I've seen recipes for baking soda clay all over pinterest and thought it looked like a pretty easy way to make some new white ornaments for the tree.  I also had an idea of making some mini clay Christmas bunting.  The dough sounded ideal (I used this recipe but made a half size batch) - three ingredients, easy to make, the clay stayed white,  you could stamp it with patterns and you could air dry or oven dry it.  Well, this is the story of a pinterest fail!  The dough worked, was lovely to roll out, and easy to stamp.  But, it cracked really badly when it dried (I chose to air dry rather than oven dry so they would dry slowly). They cracked so much that those 6 ornaments in the picture above were all that were salvageable from the entire batch of about 25!  I don't know what went wrong.  It didn't seem to be because of the thickness of the rolled out clay.  I had both thick and thin ornaments crack.  Some ornaments cracked where I had pushed a hole in the for stringing up.  Some cracked where I had stamped them.  Others cracked in random places.
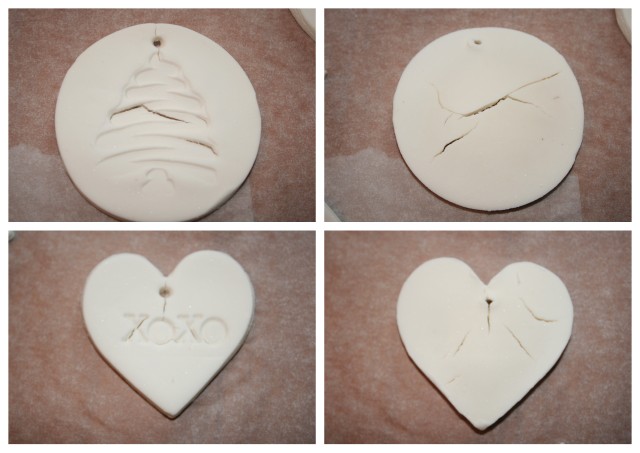
Cracked Baking Soda Clay :(
The ornaments that I did manage to salvage do look lovely.  They did stay white as the instructions promised, but took about 3 days to fully dry.  I painted a couple of them and then sealed them with PVA (white glue).  The rest I covered with PVA and sprinkled with fine white glitter.  These ones are my favourites.  The white glittery stars look lovely on the tree when the fairy lights are on!


Air Dry Clay Ornaments
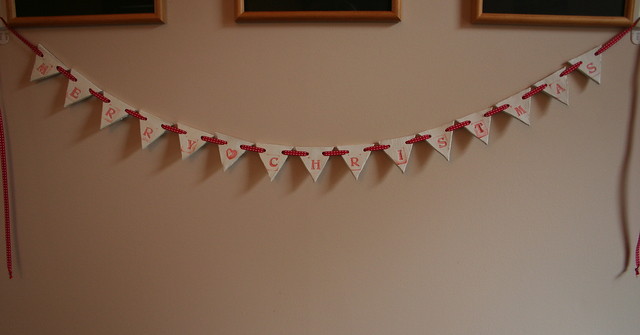
Air Dry Clay Bunting

Air Dry Clay Ornaments
I was still determined to make my clay bunting, so after some research online, I bought some Jovi Air Dry Clay from Warehouse Stationery.  At only $7 for 500g, I figured if this didn't work either, I wasn't going to be much out of pocket.  But it did work.  Wonderfully well in fact!  Here is my tray of ornaments ready to dry.
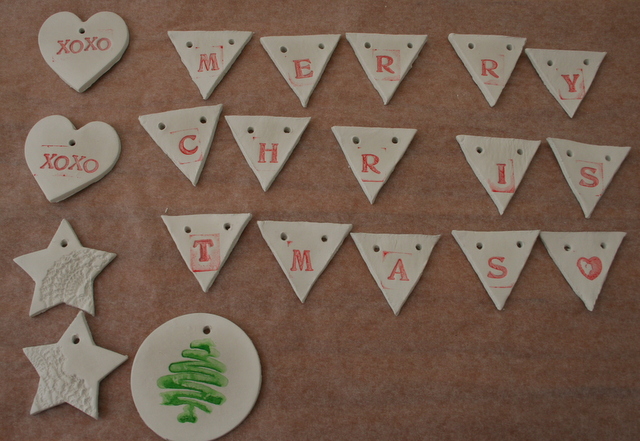
Air Dry Clay Ornaments
 I made a paper template for the bunting flags and cut them out with a sharp knife.  The other shapes I cut with cookie cutters.  I used rubber stamps and ordinary crafting ink to decorate them.  Two of the stars are imprinted with a doily that I rolled onto the clay before cutting them out.  They took just over 24 hours to dry fully and then I sprayed them with spray varnish before stringing them on ribbon. I only used about half a packet of dough, so I have plenty left for other projects.  The clay was not as white as the baking soda clay, but it seemed to whiten as it dried.  A much better result - I love my cute new bunting!  I think I might have to make some for birthdays and other occasions so I can have bunting hanging up year round!


Tuesday, 24 December 2013

{26 Things I Made}: 21 & 22/26 - Florentine Slice and Christmas Mince Pies

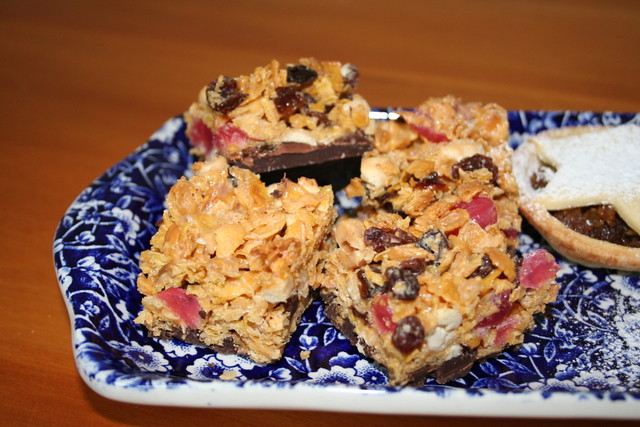
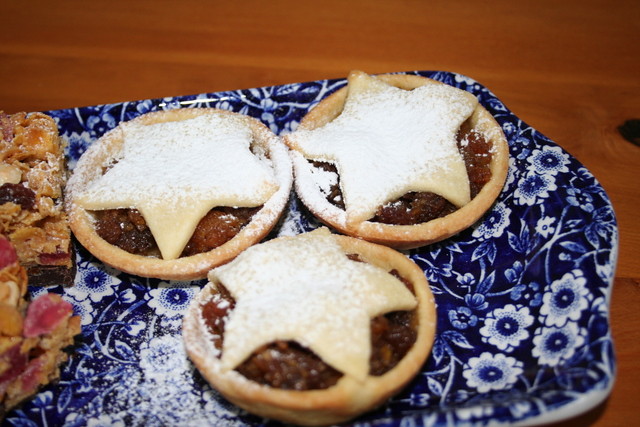
Florentine Slice and Christmas mince pies I love baking for Christmas, and luckily I have a husband with a sweet tooth like mine who loves to eat my baking.  Win, win.  I bake, and someone else can eat most of it!  This year we will be hosting some of Alex's family for morning tea on Christmas day, so I thought I should make some special festive treats.  These two recipes are favourite Christmas treats in our house.


Florentine Slice

Florentine Slice
An easier version of the traditional Florentine biscuit.  The recipe originally came from one of my mum's Australian Women's Weekly cookbooks, but I have adapted it to be vegan.  The key ingredient is soy condensed milk, which I buy online from the Cruelty Free Shop in Auckland.   I have not tried to make my own soy condensed milk, but I understand it is not too tricky to make, so that might be a project for next year.

400g vegan dark chocolate (I use Whitakkers Dark Ghana or Bittersweet Block)
1 1/2 cups sultanas
4 cups crushed cornflakes (crush lightly in a bag, then measure out)
1 cup unsalted roasted peanuts
120g red glace cherries, chopped
1 tin Soymilke soy condensed milk

1. Prepare two 28cm x 18cm slice tins by lining with tinfoil and greasing lightly.  Preheat oven to 190degC.

2. Melt chocolate in a double boiler or in a microwave jug, stirring until smooth. Pour half the chocolate into each tin and spread out evenly.  Refrigerate until set.

3.  Combine all other ingredients in a large bowl.  When chocolate is set, spread mixure evenly over chocolate.

4. Bake for 15-20 mins until just starting to brown.  Leave in tin to cool.  When cool, cut into squares with serrated knife.

Makes about 48 squares.  Freezes well.

Note:
I find that sometimes the chocolate bubbles slightly from being baked.  The original recipe called for cooking chocolate, which I guess can cope with being baked.  After researching similar recipes online, next year I will try to bake the topping first and then "ice" the bottom of the slice with the melted chocolate after baking, to preserve the look of the chocolate.  Despite the bubbles, it is still as rich and chewy and delicious as ever!


Vegan Christmas Mince Pies

Christmas mince pies For this recipe you definitely need a food processor for both the fruit mince and the pastry.

I used Alison Holst's easy fruit mince recipe, online here.  The only change I made was to substitute chopped dried apricots for the mixed dried fruit as I am not a huge fan of mixed peel.  The recipe made enough fruit mince for just over 3 dozen pies (made in normal muffin tins).

For the pastry I used this recipe.  A single batch made enough for 12 mince pies.  I cut the bases out using an 8cm diameter round cookie cutter and the tops using a 7cm star cookie cutter.  I sprayed the muffin tins, put in the pastry bases, put in a dollop of fruit mince and popped a star on top.  I brushed the tops with a little soy milk and baked them at 180degC for 15-17 minutes.  Cool in the tins, then take out and cool on wire racks.  Sprinkle with icing sugar just before serving.

Saturday, 7 December 2013

{26 Things I Made}: 16 + 17/26 - Christmas craft

I finished the Turtle costumes for the school show and they looked so cute!  I will be back soon to share some pictures, but in the meantime here is the first of the Christmas crafting.

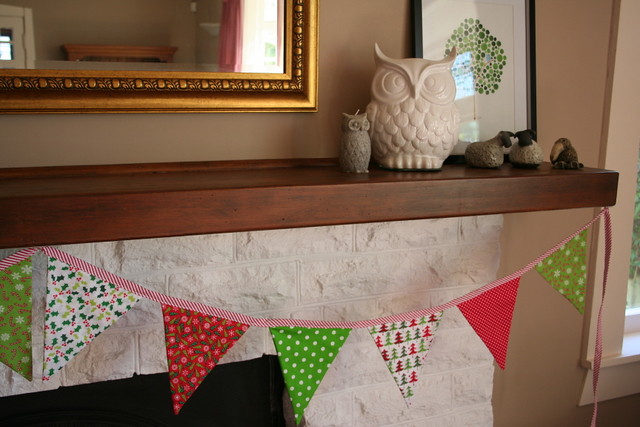
Some new bunting for the lounge.  I made some bunting last year, but never blogged it and I wanted to make some more this year so that both of our fireplaces had festive bunting.  I used the largest size from the template here and made it double sided.  I cut the striped fabric on the bias to make the ribbon at the top because I wanted it to look a bit like candy canes.

Christmas bunting

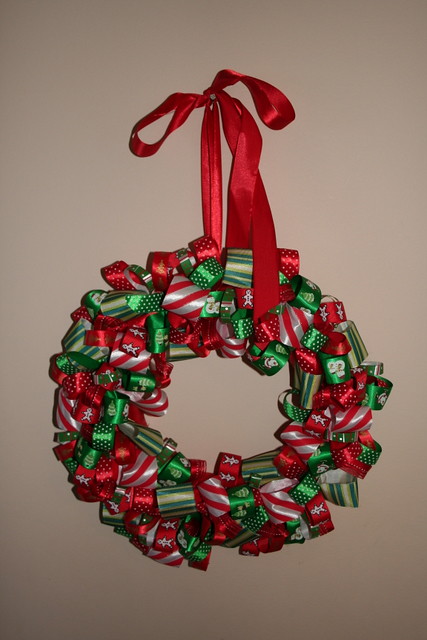
A Christmas ribbon wreath.  I actually made this in January but haven't blogged it until now.  I had it on last year's Christmas craft list and I didn't get it finished in time for Christmas day, but I was determined to finish it in the New Year.  I used the instructions here.  It was simple, but time consuming to cut the ribbons, sew them into loops and then glue them onto the wreath form.  I wrapped the polysterene wreath form with ribbon first and then made the hanging loop before I started gluing.

Ribbon wreath

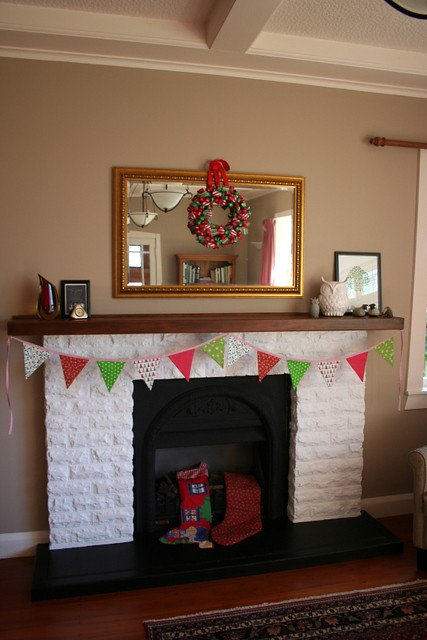
 I struggled with where to hang the wreath. Didn't want it exposed to the elements on our front door, or hanging outwards on a window where we couldn't see it. Then I saw some mantles on Pinterest that had wreaths hanging over the mirror and decided that would be the perfect place. I love how Christmassy our fireplace looks now! Christmas fireplace