Thursday, 17 April 2008

Tutorial Roundup - bags


I’ve been thinking about starting a semi-regular post where I share links to my favourite tutorials on other blogs. Hopefully this will serve two purposes – the first is to showcase some of the great free tutorials and patterns I’ve found out there in internet-land, the second is to allow me to easily find my favourite patterns ! Over the next few weeks I’ll focus on a different topic, either sewing or knitting.

So, the first in this series is bags. There are a huge number of great tutorials out there; the following are just some of my favourites:

1. Jordy Bag: When I first got back into sewing in a big way, the thing I started with was bags, specifically the Jordy Bag on Craftster. This is a great, very popular, beginner pattern for a lined square-bottomed bag. There are a lot of variations on Craftster to give you ideas of how to adapt the pattern to make it your own. This pattern can be easily adapted to make a basic tote bag by making it bigger and adding two small handles rather than one long handle.

2. The Wasp Bag (see picture above): one of my favourite patterns. I love the slouchy look of it and the pleats and round bottom mean you can stuff a lot of stuff in this bag! This has become my everyday handbag. The construction method used for this bag is slightly confusing, so I recommend you don’t attempt this pattern if you are a newbie sewer.

3. Triangular Cosmetics Bag: Another Craftster tutorial. I adapted this pattern slightly and made a lot of these for Christmas presents last year. Don’t be put off by the zip – the instructions include lots of pictures to guide you through.

4. One Hour bag: I have yet to make this one, but it looks super-easy and is a nice shape.

5. Hobo Bag: Another one on my to-do list.

6. Skipping/Bucket Bag. Great tutorial from Melissa of Tiny Happy. Another variation of the same shape of bag (slightly more complicated construction) can be found here at LulaLouise.

Many more bag tutorials can be found here on Craftster.


Hope you find these useful. If you have any other favourites, I'd love to hear about them. Happy sewing!

Wednesday, 16 April 2008

Sewing with knits

I spent a good part of last weekend playing with my new overlocker (serger). I had a quick lesson in the basics (threading and few of the stitches) when I picked it up, but I'm still learning. I got a couple of free lessons included with the purchase of my overlocker, but I don't have a lesson booked for a couple of weeks, so in the meantime I'm teaching myself/fumbling along.

The first project I made was a disaster and has been consigned to the "chuck or remake into something else" pile for now - I attempted an apron top with a rolled hem edge, based on a top I already own. It was a bit ambitious for a first project, and the silk fabric I chose was too lightweight so the cowl neck doesn't sit quite right. I may try the pattern again with a heavier fabric, but I decided to move away from rolled hems on slippery fabrics to something more suitable for a first project...

Here is my first (of many I suspect), long-sleeved merino knit top:


I had been scared of sewing knits up until now, as I always ended up with wavy seams when I used my ordinary (but quite old) sewing machine. But the overlocker makes it so easy to do side-seams in one go. And the differential feed means the seams are flat and not wavy! Hallelujah - a whole new world of sewing knits has been opened up for me.

I used some fine merino knit that I picked up from Fabric Warehouse for $18 a metre. I think I used about a metre of fabric in total. I cut the pattern off an existing merino top. Around the neck I used some stretchy binding that is made specifically for knits. The lady in the Fabric Warehouse assured me that it was easy to use, but I had trouble getting it to sit properly on the hem and sleeves and ended up unpicking it and adding bands instead. For some reason the binding looked much better on the neck. Next time I might try and experiment with hemming the bottom seam on my sewing machine.

The fit is pretty good, given that I am no pattern-making expert. It fits a smidgen more snugly than I wanted however, because I made the fatal error of forgetting to include the width of the overlocker hem (7mm) in my calculations, so I added a 12mm seam allowance and then cut all of it off when I did the seams (I should have only cut off 5mm). Whoops. But it still fits at least, and I needed a fitted warm top to wear under short-sleeved tops anyway (I like how I can justify my stuff-up!).

I can see myself making a few merino tops; maybe a wrap cardigan style (an adult-sized long-sleeved version of this from Tiny Happy perhaps) or adding some embellishments, like a freezer paper stencil (I really like this one that Jessicah at Spinning a Yarn made).

In addition to the merino top, I also had a practice at re-styling some baggy tshirts to make them more fitted. Also a lot of fun, but more on that later.

Edited to add:
A couple of people have asked me about the stretchy binding I used. It is called Foldover Elastic Binding. It's about an inch wide with a thin piece along the middle that allows you to fold it in half easily. One side is matte, the other side is shiny. It is the same stuff that is used to bind the necks of some merino tops you can buy from places like Max. From some google searches, it looks like the same stuff is often used on home-made cloth nappies to bind the legs.

I had trouble getting the seam to lay flat. I was applying the binding in one step with a straight stitch, catching the front and back at the same time and using lots of pins - I think I was stretching the seam too much as I sewed. I have since found some tutorials online that say to apply the binding to the back using a zigzag first and then fold it in half and straight stitch the top. That might give a better finish - I will do some experimenting.

Saturday, 12 April 2008

Lovely Mail

It's a lovely sunny Autumn Saturday in Wellington. I went for a run this morning along Petone beach and the harbour was (almost) like glass. A couple were even getting married on the beach (brave planning on their part which looks like it paid off!)

Today I wanted to show you a few lovely things I received in the mail this week.

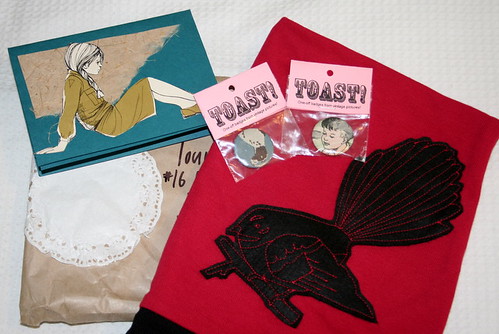
The first is a lovely red singlet that I bought from Rhiannon of Toast and Cupcakes. It features a stunning applique of my favourite bird, the NZ fantail (piwakawaka). I wore it to work yesterday with a long-sleeved top underneath and it looked great! I'm going to get a lot of wear out of this I think. Thanks Rhiannon!


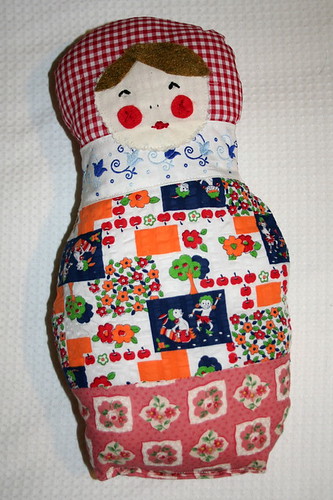
The second is a parcel I received from Helen of Show Your Workings. I won a giveaway on her blog and was sent this wonderful Matryoshka softie. She is lovely and is going to look great in my new sewing space once it's set up. Thanks Helen! This is the second blog giveaway I've won. I've been thinking it's about time I reciprocated and did a giveaway myself. Maybe next week.


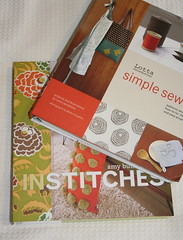
The final thing I wanted to show you was some new craft books I ordered from The Book Depository. I got Simple Sewing by Lotta Jansdotter and In Stitches by Amy Butler. Can I just say, wow! They are both great, inspiring books. Lots of wonderful photos and simple stylish projects. I can see myself making a lot of things out of them.

Thursday, 10 April 2008

Japanese Fabric

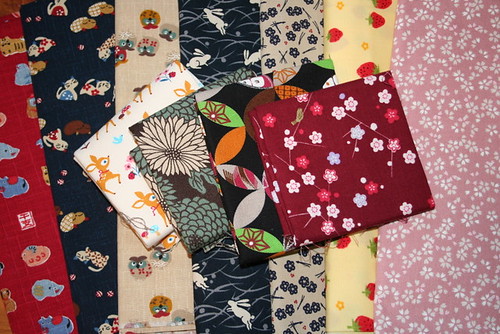
My best friend recently went to Japan on holiday. I think the first thing I said to her when she told me she was going was "you MUST visit the craft shops"! She's not particularly crafty herself, but she sort-of understands my fabric obsession, so she posted back for my birthday a parcel from Nomura Tailor containing half yards and fat eights of some great Japanese craft fabric, plus a couple of patterns for children's clothing.

She obviously knows me very well, because I love all the fabrics! In fact I have been coveting the owl and rabbit prints (in the middle of the photo) in some online stores. All the prints also coordinate well with my existing stash. I'm looking forward to using these in some baby shoes and bags.

Wednesday, 9 April 2008

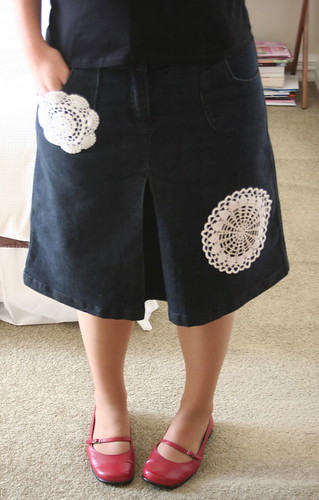
Denim and Doilies

This project has been in the "to-do" pile for ages. I finally got around to it because I had to tidy up the pile of stuff on my sewing table to make room for the new overlocker (although, to be honest, "tidying" the pile in the end meant moving it to the floor beside my table - ha!).

I first saw this idea here at Somner Designs and then here at Tiny Happy. So easy and (almost) instant gratification. I sewed these doilies on by hand but I'm sure you could also carefully machine sew them. I think it will look great with my winter boots - the doilies remind me of snowflakes.

Tuesday, 8 April 2008

30

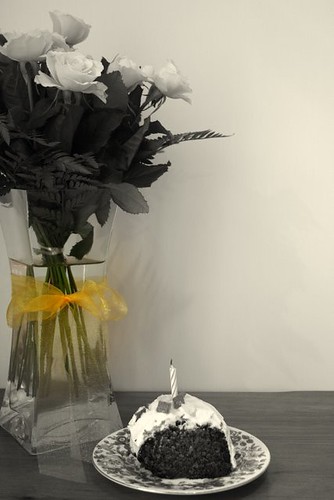
Today is my birthday. The calendar says I'm turning 30, which I find very hard to believe. I certainly don't feel 30. When I was in my early 20s, 30 seemed, well, old. But now that I'm here, it seems OK. I'm a lot more mature now than I was 10 years ago. And I know a lot more about myself and my goals. I've also stopped caring so much about what other people think. And those are good things I think.

I celebrated with friends over dinner on Saturday and with family over cake on Sunday. I've been having an extended weekend and took Monday and today off work to relax and get some crafting done. I should have some photos to show you later in the week.

Right, I'd better be off - Alex got me an overlocker (serger) for my birthday and I'm about to go and pick it up. Looking forward to playing with my new toy!

Sunday, 6 April 2008

Rainbow wool

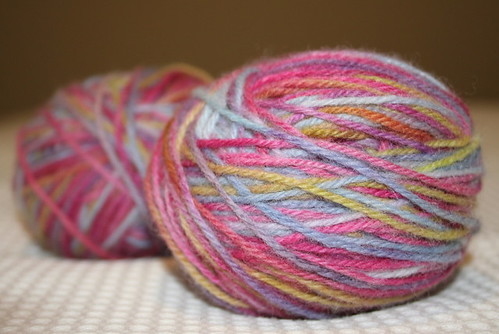
I've been wanting to try dying wool myself for a while. There are lots of methods out there, but the easiest seems to be using Kool-Aid or an equivalent (in NZ we have Raro and Refresh among others). I used some plain white 8ply wool I picked up from an op-shop and a whole lot of Raro - about 12 packets. This was the second time I tried to dye this hank. The first time I only used 4 packets and it was definitely not enough! So I overdyed the same hank using roughly the same colours.

I loosely following the instructions from here, here and here, following the microwave method rather than the stovetop method. I mixed the colours up in plastic bottles with squeeze-top lids which worked really well for applying the colour. I only used enough warm water to dissolve the powder.

Here's the wool in the laundry sink, just after I've finished applying the colour:


Here it is about a week later, dry and wound into balls. I'm really surprised at how vibrant the colours remained once it dried:

And just because I couldn't wait, I cast on and knit a few rows this morning to see how it is going to knit up:


Some tips if you're going to try this yourself:
1. Just because you are using something that is theoretically "edible" to dye the wool, do not assume that spilt dye will not leave a stain on your kitchen bench if you don't wipe it up straight away.

2. Ensure the dish you are going use actually fits in the microwave before you put your dripping just-dyed hank of wool in it - transferring the dye to a smaller dish may mean the dye spills all over your kitchen bench (see tip above).

3. Think carefully about what colours you will use and how they will look when combined with the colour next to them. I used red (Raspberry Refresh), green (Sour Apple Raro) and blue (Wacky Raspberry Raro). In hindsight I think I should have just used red and blue and made a feature of the purple where they mixed together. Plus, the green turned sort-of yellowy-orange when it mixed with the red, which was not the look I was after!

4. Mark in some way the ends of the hank of wool so that later when you are winding it back into balls, you can find the ends and the hank doesn't end up in a greatbigmessytangle.

5. Use the best wool you can sacrifice. I used cheap scratchy white op-shop wool. Though I now have lovely rainbow dyed wool, it is still scratchy, so not really suitable for hats or scarves. I think I might try knitting a bag and felting it, maybe something along the lines of this.

Tuesday, 1 April 2008

Thrifty Finds

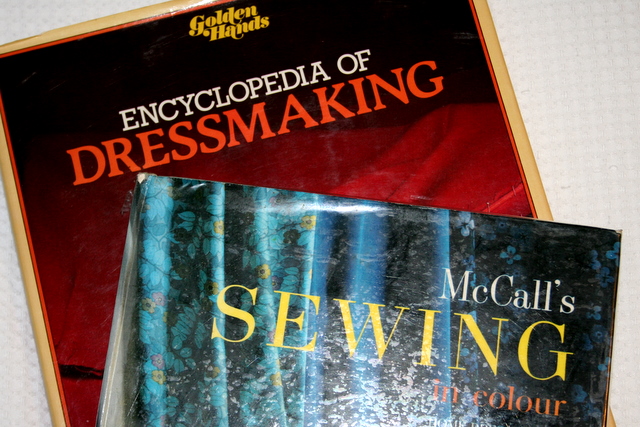
I picked up a couple of great old sewing reference books at an op-shop (thrift store) recently and wanted to share them with you.


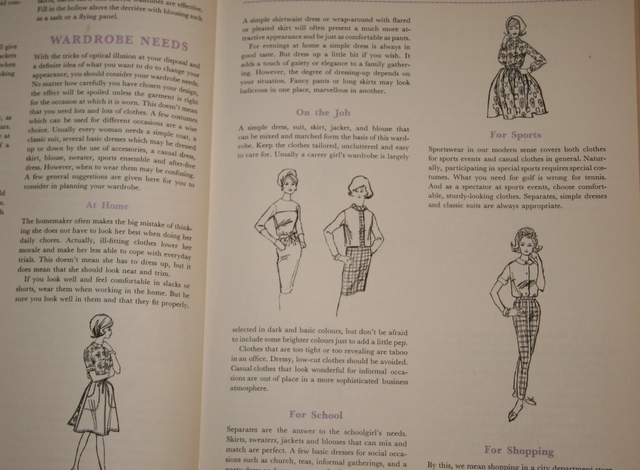
"McCall's Sewing in Colour" was published in 1963, but still has a lot of good reference information that I'll find useful I think. It's divided into sections such as facing, collars, cuffs etc. There is also a fair bit of content that really places the book squarely in the 1960s. My favourite pages are those that explain the basic wardrobe needs of a modern woman:


Under the heading At Home it says "The homemaker often makes the big mistake of thing she does not have to look her best when doing her daily chores. Actually, ill-fitting clothes lower her morale and make her less able to cope with everyday trials. This doesn't mean she has to dress up, but it does mean that she should look neat and trim..." hmmm, kinda rules out my round-the-house weekend outfits! Also, under For Shopping (in a "City Department Store") it warns "Slacks and shorts are taboo". So now you know.

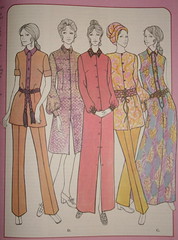
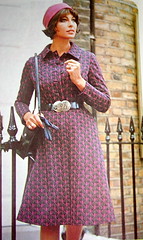
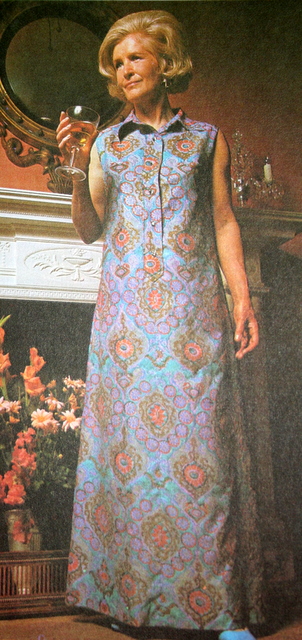
The second book, "Golden Hands Encyclopedia of Dressmaking" was published in 1972. It is also a sewing reference, but focusses more on pattern-making and includes quite a few patterns for women's and children's clothing with instructions for how to alter them to fit you. I'm hoping that along with the pattern-making class I recently went to, I should be abe to use this book to make myself some new winter skirts. Lots of great illustrations and photos in this one:

Monday, 31 March 2008

Tuesday, 25 March 2008

Easter in Nelson

We had a great Easter in Nelson. Wonderful weather, great scenery and inspiring craft-browsing. Plus lots of yummy food and local wine.

The main thing I was looking forward to was the Nelson Saturday market and it did not disappoint (lots of pictures at the end of this post). Melissa (who used to live in Nelson) recommended the food stall that sold stove-pot coffee and traditional Dutch apple donuts (OlieBol). Deeelicious. It was a great way to start the morning, squashed at picnic tables next to the locals enjoying their weekly donut fix.

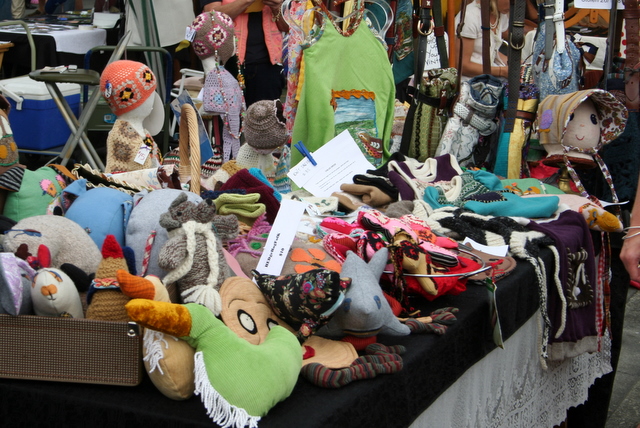
Other stand-outs at the market included a stall called Vintage Heaven, selling great bags and clothing made from designer fabrics, and Atticus Finch (also recommended by Melissa), selling quirky softies and bags. As well as these stalls there were plenty of others selling original clothing, hand-knits, softies, local pottery and paintings, jewellery, hand-made soap, fresh flowers, plants, gourmet preserves, local sheep’s-milk cheese, organic vegetables…the list goes on. The market had a really nice feel to it, almost festival-like, and there seemed to be a lot of locals out doing their Saturday shopping and catching up with friends at the market. I could quite happily have spent several hours just people watching.

Aside from the market, I also made it to a few other galleries and shops in Nelson itself. If you are into beading, I highly recommend a visit to the Bead Gallery - they have more beads than I have seen in one place before, though it pays to go there with an idea of what you want to buy, otherwise it is easy to get overwhelmed. And the South St Gallery has a great collection of local pottery all in one place.

We had a rental car for the weekend so we managed to get out and explore the surrounding area including heading over to Farewell Spit one day and also to some Marlborough Vineyards another day.

We arrived back home yesterday afternoon refreshed after our few days away, though Air New Zealand put a bit of a damper on it by losing Alex’s bag. Fortunately it turned up late last night and a courier dropped it off to our place at 11pm, looking none the worse for wear after its extended journey.

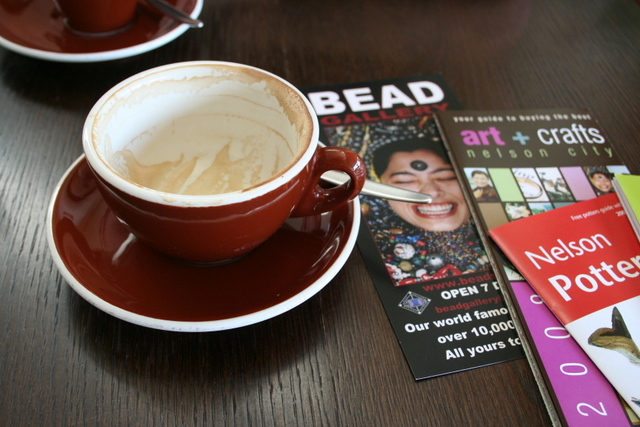
Planning our weekend over coffee

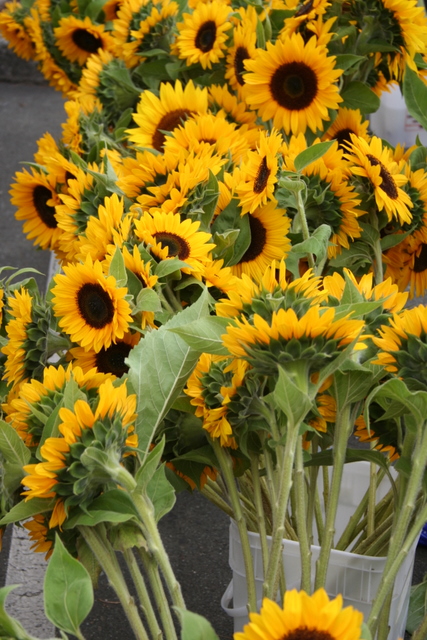
Sunflowers at the market

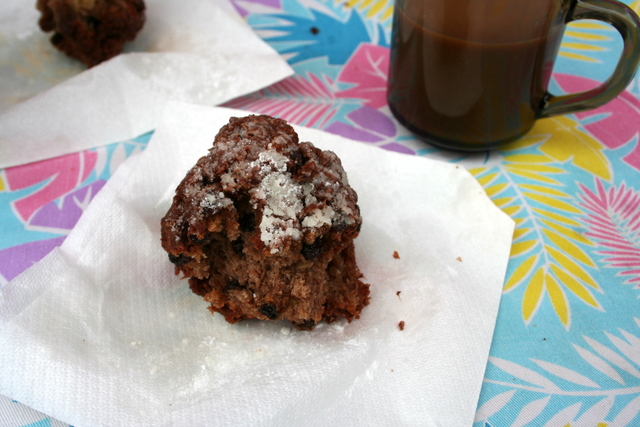
OlieBol

Atticus Finch stall

View of Nelson from the Centre of New Zealand monument

Thursday, 20 March 2008

Winter Woollies

Last year I never got around to doing any winter knitting for me. I seemed to always be knitting things for other people. So this year I decided to get organised early...

Here's my new winter hat, knit from this pattern, using a nice thick felted merino. It's hard to get a good shot of me wearing it, but you get the idea.


I originally knit this wool up as another hat from a Yarn Girls book, but once it was finished I wasn't happy with the fit or the style so I completely ripped it out and started again on a different pattern. Luckily it knit up pretty quickly on 6mm circulars so I didn't feel like I'd wasted too much effort. And I much prefer this final product.

And here is the beginnings of a new scarf, from this pattern. Hopefully I will get some time to work on this while we are travelling around the Nelson region over Easter.

I'm really liking how this wool is knitting up. It is called Hummingbird Calliope, and is a discontinued line I picked up for $6 a ball. I think this scarf will provide a nice splash of colour next to my dark winter coat.

Thanks for your Nelson suggestions. I will try and take lots of photos of the crafty goodness to share with you next week.

Have a good Easter break!

Tuesday, 18 March 2008

Easter Plans

We are going away for Easter, so on Sunday I decided to make Hot Cross Buns a week early. I don't make much bread because of the time involved in kneading, rising the dough etc but making these reminded me how much I enjoy it. I think I will have to try Amanda's WHO bread next. I got a Kenwood mixer from Santa (Alex) at Christmas and it makes kneading the dough really easy, so I don't have an excuse for not making bread really.


I used a basic recipe that I got from Alex's Mum a few years ago, but it looks similar to the recipe in the Edmond's cookbook (I can't believe there is a Wikipedia entry for it!). I didn't bother piping crosses on, because I always make such a gluey mess when I do that, and the crosses are made from just flour and water so don't add to the yumminess. I did try to cut crosses into the dough before I proofed it the second time, but the cuts just disappeared as the buns grew. Oh well, they tasted good though.

Continuing on the Easter buns theme, have any of you kiwis tried the Schoc Easter chocolate? Oh. My. Goodness. It is divine. Dark chocolate that tastes just like Hot Cross Buns, complete with pieces of citrus peel and sultanas. Much better than any easter egg, I feel.

We are off to Nelson for Easter so if any of you have any suggestions for must-see crafty places or must-visit cafes in Nelson or the surrounding area, please let me know. Already on the list is the Saturday morning market and the Bead Shop.

Friday, 14 March 2008

Toasty ears and other things

Another baby knit for a friend. These went to baby Lily along with the Mary Jane booties I posted about a week or so ago. This hat was my backup gift in case Lily turned to be a boy and I couldn’t give her the booties. I thought the green and white was pretty gender neutral. Once it was finished, I decided to add the crochet flower to sort-of match the booties.


I used
this great pattern which I found via Ravelry. The designer of this hat also has free patterns for an adult-sized earflap hat which I think I need to add to my knitting to-do list. I used a soft merino-silk blend 8ply which knitted up pretty quickly on circular needles. The flower is based on one from the SNB Happy Hooker book.

When I was adding my pictures to Ravelry I noticed that my hat bears a very striking resemblance to
this one, which I had favourited in Ravelry some time ago, though I can’t remember doing so. Here I was thinking I was being all unique with the stripes and the flower, but obviously I was drawing on one I’d seen before…

Other things:

- I haven’t mentioned Ravelry much on this blog, but if you are into knitting or crochet, even in a small way, I recommend you sign up for an invite. It’s an online knit and crochet community where you can, among other things, post your projects, keep track of your stash and meet other crafty peeps. It’s still in testing, but I got an invite after only two weeks. I love the fact that you can search through hundreds of patterns, a lot of them free, and see all the different versions that other people have made. It’s also great for discovering new yarns.

- I’ve nearly finished knitting a winter hat for me. Photos next week. Next up is a scarf. I needed a change from all that baby knitting

- I got an email earlier in the week advising me that the Knit World Studio is now open – looks like a fancy yarn store with designer yarns and classes. Plus, it’s in my neighbourhood! My credit card is quivering with excitement already.

- Tomorrow I’m attending a pattern making course all day. I’m going to learn how to draft skirts and trousers that will actually fit! Looking forward to making some winter skirts.

- I discovered a new online bookstore a couple of weeks ago: The Book Depository. They have a wide range of craft books that are not readily available in NZ and free worldwide delivery. Their prices are also much cheaper than Amazon.

Monday, 10 March 2008

Marbled Brownie

Well, that was a bit of an unscheduled blogging break!

I was pretty busy at work last week and then had my cousin from England visiting at the weekend so didn't get much time to blog. I did get some baking and knitting done over the weekend though. I made the brownie mentioned in the title (see below) on Saturday when we had some friends over for dinner and spent a lot of the rest of the weekend gossiping with my cousin on the couch while we both knitted. She is a recent convert to knitting and I enjoying teaching her a few tricks and showing off some of my completed projects. She even managed to complete a project of her own (a mobile phone cosy) while she was here.

For dessert on Saturday I made marbled brownie. It doesn't look like much, but believe me, it was a deliciously dense chocolate and sugar overload.

The recipe is from here. You basically make a brownie mix and a cheesecake mix and then swirl them together. Divine. Luckily I had 6 people to feed so there aren't many leftovers hanging around to tempt me this week...

Saturday, 1 March 2008

Denim Lotus Bag

I've been working on this bag for a little while. It is my entry into the Craft Magazine "Sew Inspiring Amy Butler contest". Entries close later today NZ time.


The design borrows ideas from a few other bags I've made over the past couple of months plus I also included a few new ideas such as the single strap and the tab with a magnetic snap to close it. The rules for the contest were that you had to make a bag either incorporating Amy Butler fabric or using an Amy Butler pattern. The main body of this bag is denim; the lining is a neutral coloured cotton. The feature fabric is Sky Wallflower by Amy Butler. The internal pocket also uses the Wallflower fabric plus a small amount of Full Moon Polka Dots in Slate, also by Amy Butler. Both of these fabrics are from her Lotus collection.

I'm quite pleased with how this bag turned out in the end. It went through a couple of design changes mid-construction, so I was a bit worried about the end result, but it all came together well I think. I'd like to make a few more tweaks to this design, but I think I will make a few more bags similar to this to open my Etsy shop with.